
Why Preventive Garage Door Maintenance Matters in Terrell, TX
As a homeowner in Terrell, Texas, you rely on your garage door every single day. Whether you are rushing off to work down Highway 80, heading out to Lake Tawakoni for a weekend fishing trip, or simply pulling into your driveway after shopping downtown, your garage door opens and closes thousands of times a year. In fact, for most local families, the garage door is no longer just a place to park a vehicle—it is the main front door of the home.
Yet, despite being the largest and heaviest moving mechanical system in your entire house, the garage door is often the most neglected. We press the button on the remote, expect it to slide up smoothly, and pay no attention to it until the day it suddenly stops working. When a garage door breaks, it is never convenient. It can trap your car inside when you are running late, leave your home exposed to property loss, or create a severe safety hazard for your family.
The intense North Texas weather does not make things any easier. Our region experiences extreme seasonal shifts—from scorching summer heat over 100°F that expands metal hardware, to sudden thunderstorm downpours, high wind events, winter freezes, and heavy spring pollen accumulation. These environmental factors put extra strain on springs, rollers, cables, and electronic sensors.
The good news? You do not need to be a mechanical engineer to keep your garage door running smoothly. By spending just 15 to 20 minutes every few months performing basic maintenance, you can extend the life of your door system, prevent costly breakdowns, and avoid needing emergency Garage Door Repair services.
In this comprehensive guide, we will break down four simple, practical maintenance steps that every Terrell homeowner can easily perform. We will also cover essential safety guidelines, tool requirements, seasonal checklists, and clear indicators of when it is time to call in a licensed professional.
Essential Safety First: Preparing for Garage Door Care
Before diving into maintenance tasks, you must understand the basic safety rules of garage door systems. A standard residential garage door can weigh anywhere from 150 to over 400 pounds. It operates under immense spring tension, which allows a small electronic motor to lift that heavy weight with ease.
If you respect the mechanics and follow standard safety protocols, performing basic maintenance is completely safe and simple.
+-----------------------------------------------------------------------------------+
| SAFETY WARNING |
| Never attempt to adjust, loosen, or repair high-tension torsion springs, bottom |
| roller brackets, or lifting cables yourself. These components are under severe |
| mechanical tension and can cause catastrophic injury if tampered with improperly. |
+-----------------------------------------------------------------------------------+
Essential Tools and Supplies to Have on Hand
You do not need an expensive setup to maintain your door. A simple home toolkit is all it takes:
- Eye protection and work gloves: Keep dirt, metal shavings, and lubricant out of your eyes and hands.
- Synthetic silicone or white lithium spray lubricant: Specially formulated for garage doors.
- Clean microfiber rags or shop towels: For wiping down tracks and removing old, gunky grease.
- Mild household detergent and a sponge: To clean vinyl weather seals and door panels.
- A standard socket set and screwdriver kit: To check and snug up loose nuts and bolts.
- A 2x4 wooden block: Needed to test your opener’s mechanical safety reverse feature.
- A sturdy stepladder: To safely reach top rollers, tracks, and opener components.
Tip 1: Perform a Comprehensive Visual and Auditory Inspection
The first and easiest maintenance step requires no tools at all—just your eyes and ears. Developing a habit of regularly watching and listening to your door operation allows you to catch minor mechanical issues before they turn into major structural repairs.
The Visual Check: What to Look For
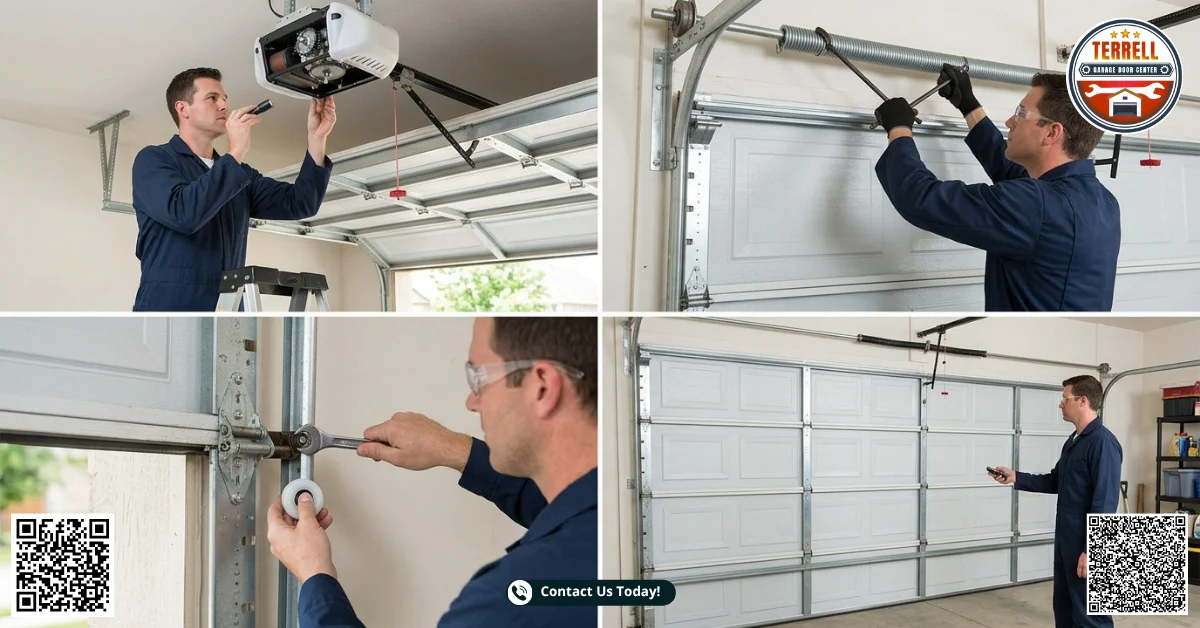
At least once a month, stand inside your garage with the door closed and inspect the physical hardware. Use a flashlight if your garage is dark.
- Examine the Lifting Cables: Look at the steel cables attached to the bottom brackets on both sides of the door. Check for signs of fraying, worn strands, rusting, or slacking. Frayed cables are a ticking time bomb and should be replaced immediately by a technician.
- Inspect the Rollers: Look closely at the wheels (rollers) that slide inside the steel side tracks. Whether you have nylon or steel rollers, check for cracks, flat spots, severe chips, or heavy wobble. Worn rollers place extra strain on your electric opener motor.
- Check the Springs: Look up at the center torsion spring above the door header (or the extension springs running along the upper side tracks). Look for visible gaps between the coils, which indicate a snapped spring, or heavy surface rust.
- Inspect Hinges and Brackets: Look at the metal hinges connecting each horizontal door section. Check for cracked metal, missing screws, or loose mounting bolts where the hinges attach to the panels.
- Look over the Pulley System: If your system uses extension springs, inspect the pulleys at the ends of the springs for worn bearings, cracks, or grooved track wear.
The Auditory Check: What Sound Is Your Door Making?
A healthy garage door should operate with a consistent, relatively quiet humming or rolling sound. When hardware begins to fail, it speaks to you through distinct noises.
Here is a handy diagnostic guide to help you translate what your garage door sounds mean:
Sound Detected | Potential Root Cause | Recommended Action |
High-pitched squeaking or screeching | Dry hinges, rollers, or bearings lacking lubrication | Apply garage-door-approved silicone spray lubricant |
Loud popping or snapping noise | Torsion spring binding, or a spring coil snapping under pressure | Stop using the door; call for professional spring repair |
Heavy grinding or metal scraping | Misaligned tracks, worn steel roller bearings, or loose cable tension | Inspect tracks for rubbing; inspect steel rollers for wear |
Slapping or rattling sound | Loose mounting hardware, loose chain drive belt, or worn panel hinges | Snug loose hardware; check opener chain tension |
Straining or groaning motor | Unbalanced door weight or motor capacitor failure | Perform a manual balance test (see Tip 3) |
If you notice persistent grinding or popping noises even after basic lubrication, it is best to consult a specialist in Garage Door Repair to prevent motor burnout.
Tip 2: Master Precision Lubrication (Using the Right Products)
If you only perform one physical maintenance task all year, make it lubrication. Proper lubrication reduces metal-on-metal friction, prevents rust buildup caused by East Texas humidity, reduces noise, and dramatically extends the operational lifespan of every moving part.
However, many Terrell homeowners inadvertently damage their doors by applying the wrong products.
The Common Lubrication Myth: Why You Should Avoid Standard WD-40
The single biggest mistake homeowners make is spraying standard WD-40 multi-use product all over their garage door tracks and hardware. Standard WD-40 is a solvent and water-displacer, not a long-term lubricant.
When you spray standard WD-40 on garage door parts, it strips away the factory grease, collects ambient dirt and pollen, and evaporates quickly—leaving your metal components drier and more prone to wear than before.
+-----------------------------------------------------------------------------------+
| LUBRICATION DOS AND DON'TS |
| DO USE: Synthetic Silicone Spray or Heavy-Duty White Lithium Lubricant. |
| DON'T USE: Standard WD-40, Automotive Engine Oil, Sewing Machine Oil, or Grease. |
+-----------------------------------------------------------------------------------+
Heavy automotive grease or thick oils should also be avoided because they attract North Texas road dust, dirt, and bug debris, turning into a sticky paste that clogs roller bearings and binds tracks.
For maximum protection against local weather conditions, refer to official industry guidelines provided by the [External Link: Door and Access Systems Manufacturers Association (DASMA)].
Step-by-Step Lubrication Protocol
Perform this lubrication procedure every six months (ideally in early spring and late autumn):
- Safety First: Disconnect power to the automatic garage door opener by unplugging it from the ceiling outlet or turning off its circuit breaker. This prevents anyone from activating the door while your hands are near moving parts.
- Clean Before You Lubricate: Use a clean rag to wipe down dirt, old grease, and dust from hinges, springs, and roller shafts.
- Lubricate the Springs: Spray a light, even coat of silicone lubricant across the entire length of the top torsion spring (or side extension springs). You do not need to soak it—a light film prevents coil binding and stops rust.
- Lubricate the Hinges: Apply a small squirt of lubricant directly onto the pivot points of all panel hinges.
- Lubricate the Roller Bearings: If you have steel rollers with exposed ball bearings, direct the spray nozzle straight into the center bearing core. If you have sealed nylon rollers, you only need to spray the stem shaft where it slides into the hinge sleeve.
- Lubricate End Bearing Plates: Apply a brief spray to the circular bearing plates located at the top outer corners of the door frame where the torsion bar rotates.
- Lubricate Lock Mechanisms and Handles: Spray a small amount into the keyhole and manual lock latch mechanisms to keep them operating smoothly.
- Wipe Away Excess: Use a shop towel to wipe up any drips or excess spray to prevent it from dripping onto your vehicle or floor.
What You Should NEVER Lubricate
To keep your system operating safely, keep spray lubricants completely away from these two areas:
- Inside the Steel Tracks: Never spray lubricant inside the vertical or curved overhead tracks. Tracks require clean friction so the rollers can roll rather than slide. Lubricating tracks causes rollers to skid, slip out of alignment, and collect dirt.
- Plastic/Nylon Roller Tread Wheels: Do not spray lubricant onto the outer plastic surface of nylon roller wheels. It makes them slippery and reduces their ability to track correctly.
Tip 3: Test Balance and Safety Reversal Systems
An automatic garage door is a powerful motorized device. For the safety of your children, pets, vehicles, and home interior, your door system includes integrated safety mechanisms. Testing these features twice a year ensures they will work reliably if an obstruction ever gets in the way.
How to Test Door Balance
Your garage door opener is designed to push and pull a balanced load. The heavy lifting is actually done by the springs, not the electric motor. If the springs lose tension over time, the door becomes heavy, forcing the opener motor to work double-time until it overheats and burns out.
To check if your door is balanced properly:
- Close the garage door completely.
- Disconnect the opener by pulling the red emergency release cord down and toward the garage door.
- Grasp the door handle or bottom panel and manually lift the door smoothly up to waist level (about 3 to 4 feet off the ground).
- The Hold Test: Carefully let go of the door.
Understanding Your Balance Test Results:
- Properly Balanced: The door should stay suspended in place, hovering 3 to 4 feet above the floor with only minimal upward or downward movement.
- Under-Tension / Unbalanced (Heavy Door): If the door immediately falls shut, the springs have lost tension. The extra weight will eventually destroy your opener motor.
- Over-Tension (Hot Door): If the door snaps upward on its own, spring tension is too high, creating a hazard when closing.
[Door at Waist Level]
|
+----------------------+----------------------+
| |
[Door Stays Still] [Door Falls Down]
| |
(Perfectly Balanced) (Losing Tension)
| |
System Healthy Needs Professional Spring
Adjustment / Repair
If your door fails the balance test, do not attempt to adjust the springs yourself. Contact a certified technician specializing in Garage Door Repair to safely re-balance the torsion or extension springs.
Testing the Mechanical Auto-Reverse Feature
Since 1993, federal law requires all residential garage door openers to include an automatic safety reversal system. If the door encounters an object while closing, it must stop and immediately reverse direction.
To test this vital safety system:
- Open the garage door completely.
- Place a solid 2x4 wooden block flat on the concrete floor directly in the center of the garage doorway where the door meets the ground.
- Press your wall button or remote control to close the door.
- Observe the Action: When the bottom edge of the door strikes the 2x4 wooden block, it should instantly stop and reverse direction back to the fully open position within two seconds.
If the door strikes the block, hesitates, and continues trying to push down through the wood, the opener’s travel limit or force settings are out of calibration. Stop using the automatic opener until it has been inspected and adjusted.
Cleaning and Aligning Photo-Eye Safety Sensors
At the bottom of your garage door frame—about 4 to 6 inches above the floor—are two small photoelectric safety sensors. One sensor projects an invisible infrared light beam across the doorway to the receiving sensor on the opposite side. If anything breaks this beam, the door will refuse to close.
[Sending Sensor] ================ Infra-Red Beam ================ [Receiving Sensor]
(LED Glowing) (LED Glowing)
In Terrell, seasonal challenges frequently disrupt these sensors:
- Spring Pollen & Cobwebs: Dust and thick oak pollen build up on the small plastic lenses, blocking the signal.
- Summer Heat Shifts: Vibrations from daily use can loosen the sensor mounting brackets, causing them to point away from each other.
- Direct Texas Sunlight: During certain morning or afternoon hours, blinding low-angle sunlight hitting the receiving lens can wash out the infrared beam.
How to Maintain Photo-Eyes:
- Wipe both sensor lenses clean using a soft microfiber cloth and a mild glass cleaner.
- Check the small LED indicator lights on both units. Both lights should shine steadily without flickering or blinking.
- If an LED light is flickering or off, gently bend the mounting bracket with your fingers until both lights shine solid and bright.
Tip 4: Clean Tracks, Tighten Hardware, and Inspect Weather Seals
The final step in your preventive routine focuses on maintaining structural alignment, hardware integrity, and thermal protection for your garage interior.
Track Hygiene and Hardware Tightening
Your garage door moves up and down along vertical and horizontal steel tracks dozens of times a week. Over time, the constant vibration of the door can cause mounting hardware to loosen gradually.
- Clean the Steel Tracks: Take a clean damp shop towel and wipe down the inner channel of both left and right side tracks. Remove built-up dirt, insect casings, and dried debris. Never scrape the inside of tracks with sharp tools that can strip off the protective galvanized coating and cause rust.
- Inspect Track Alignment: Check that the vertical tracks are plumb (straight up and down) and parallel with each other. Look for noticeable bends, crimps, or dented sections caused by accidental bumps from trash cans or lawnmowers.
- Snug Up Hardware: Using a socket wrench, go around the door frame and systematically check mounting bolts. Pay special attention to track attachment brackets, hinge plates, upper bearing brackets, and the bolts holding the opener rail to the wall. Be careful not to over-tighten and strip the threads or dent thin door panels.
Inspecting and Replacing Bottom Weather Seals
The flexible rubber or vinyl seal along the bottom edge of your door does critical work for your home's energy efficiency and cleanliness. It creates a tight barrier against driving rains, drafts, dust storms, and unwanted pests like spiders, mice, and scorpions common in North Texas.
According to energy performance guides provided by the [External Link: U.S. Department of Energy], properly sealing home entry points significantly reduces heating and cooling costs during climate extremes.
Inspect your bottom seal for these signs of wear:
- Cracked, brittle, or torn rubber.
- Flattened areas that no longer touch the concrete floor when closed.
- Light visible beneath the door bottom when closed from the inside during daylight hours.
If your seal is cracked or hardened, replacing it is an easy DIY project. Most bottom seals slide out of an aluminum channel on the door base and can be replaced with a new, flexible weather-strip purchased from your local home improvement center. To make sliding new vinyl seals easier, spray a tiny bit of soapy water into the aluminum channel track during installation.
Seasonal Garage Door Checklist for Terrell Homeowners
To keep your door running smoothly all year long, sync your maintenance routine with the changing Texas seasons:
Spring Checklist (March - May)
- [ ] Clear winter grime, spider webs, and pollen from photo-eye lenses and side tracks.
- [ ] Apply silicone lubricant spray to springs, hinges, and steel roller bearings.
- [ ] Perform the 2x4 auto-reverse safety test before heavy summer usage.
- [ ] Wash external door panels to remove spring pollen buildup and mud.
Summer Checklist (June - August)
- [ ] Inspect bottom weather seals for heat warping, cracking, or deterioration.
- [ ] Check opener motor operation during high heat days to ensure it isn't overheating.
- [ ] Check panel alignment to ensure high temperatures haven't warped wood or composite trim.
Fall Checklist (September - November)
- [ ] Perform the manual balance test before winter weather arrives.
- [ ] Tighten all hinge hardware, track mounting brackets, and opener rail bolts.
- [ ] Lubricate all moving metal components to protect against autumn moisture and humidity.
Winter Checklist (December - February)
- [ ] Inspect rubber weather seals along top and side perimeter stop molding to prevent icy drafts.
- [ ] Clean track channels to prevent moisture freezing inside track grooves.
- [ ] Test remote control batteries and replace if range decreases in cold weather.
Refer to regional environmental trends published by the [External Link: National Weather Service] to time your seasonal checks before major heatwaves or winter cold fronts hit North Texas.
When DIY Ends: Recognizing Red Flags that Require Professional Attention
While basic cleaning, visual inspections, and light lubrication are great weekend projects for homeowners, certain garage door problems are far too dangerous to handle on your own.
Knowing your limits protects you from severe injury and prevents minor hardware issues from turning into major structural damage.
+-----------------------------------------------------------------------------------+
| WHEN TO CALL A PROFESSIONAL |
| * Broken or Snapped Springs (Torsion or Extension) |
| * Frayed, Broken, or Unspooled Lifting Cables |
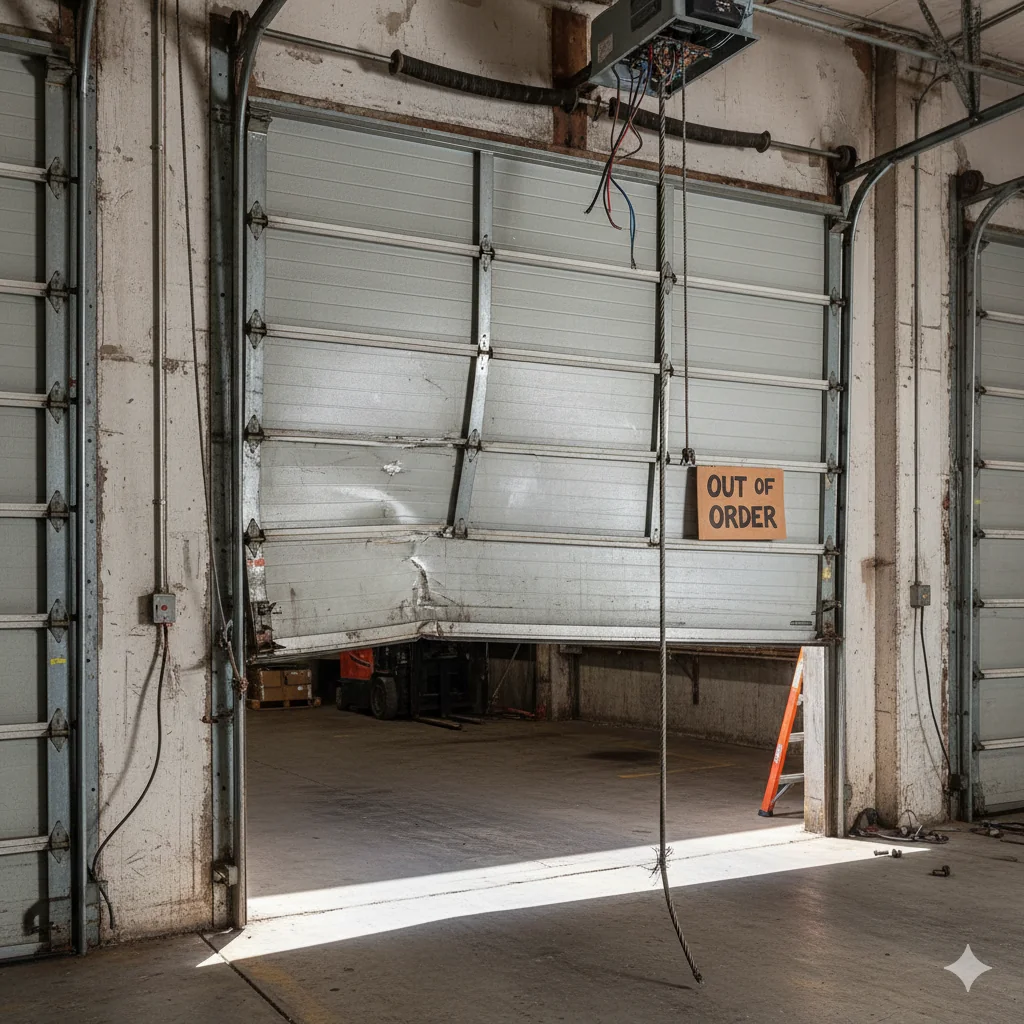
| * Door Off Track or Hanging Crookedly |
| * Bent, Crushed, or Buckled Steel Tracks |
| * Severe Structural Panel Damage or Sagging Wooden Sections |
| * Complete Motor/Opener Electrical Failures |
+-----------------------------------------------------------------------------------+
The Danger of Torsion Springs
Torsion springs store incredible potential energy to lift heavy doors. When a spring breaks, it snaps with a loud sound similar to a gunshot.
Replacing or winding torsion springs requires specialized winding bars, technical training, and precise safety protocols. Attempting to adjust high-tension springs with screwdrivers or adjustable wrenches can lead to sudden tension release, resulting in severe injury.
If you see a visible gap in your spring or hear a loud bang from your garage, leave the door closed, disconnect the electric opener, and call a professional technician for safe Garage Door Repair.
Frequently Asked Questions (FAQs)
How often should I replace my garage door opener backup battery?
Most garage door opener backup batteries last between 2 to 3 years before losing their ability to hold a charge. You should test the battery annually by unplugging the main power cord and operating the door using your remote control.
Can I paint my insulated garage door without ruining its thermal properties?
Yes, you can paint factory-finished steel or insulated garage doors using high-quality exterior acrylic latex paint. Just make sure to thoroughly clean and dry the panels first, and avoid applying thick paint layers over flexible weather stripping or section joints.
What should I do if my garage door remotes suddenly lose operational range?
Decreased remote range is usually caused by dying AAA/coin batteries or local electromagnetic interference from nearby LED light bulbs installed inside the opener housing. Try replacing the remote battery first, or switch to garage-door-compatible shielded LED bulbs inside the opener.
Why does my garage door hesitate or jerk when opening only in the early morning?
Morning hesitation is typically caused by thermal contraction during cool nights, which tightens metal tracks and stiffens old, dirty grease on roller bearings. Applying synthetic silicone lubricant to all roller bearings and hinges will usually smooth out early morning operation.
Final Thoughts
Your garage door is a workhorse that protects your vehicles, secures your property, and gives your family convenient access to your home every single day. By taking just a few minutes each season to visually inspect hardware, apply quality silicone lubricant, clean tracks, and test safety features, you can keep your door running quietly and reliably for years to come.
Preventive care costs almost nothing in time or materials, but it pays off by preventing sudden lockouts, protecting your motor from early failure, and saving you hundreds of dollars in unnecessary emergency repairs. Make garage door care part of your routine home maintenance schedule today!
How Can Terrell Garage Door Center Help You?
Is your garage door making loud grinding noises, moving unevenly, or refusing to open when you press the remote? Don't let a faulty door ruin your daily schedule or put your family's safety at risk.
At Terrell Garage Door Center, we have proudly served homeowners throughout Terrell and Kaufman County with fast, honest, and dependable service for over 15 years. Whether you need a quick safety tune-up, spring replacement, panel repair, or a brand-new high-efficiency door installation, our expert technicians are here to get the job done right the first time.
Contact Our Local Team Today:
- Business Name: Terrell Garage Door Center
- Address: 123 W Damon St, Terrell, TX 75160
- Phone Number: (469) 478-2395
Call (469) 478-2395 now to schedule your comprehensive door safety inspection or request a free estimate on your next Garage Door Repair service!